

Radio Controls
In radio controls used in modelling, there are two basic components: a transmitter and receiver. The transmitter is what you hold in your hand and the receiver is what you put in the plane. For many years, transmitters sent signals out on one specific frequency and the receiver was tuned to listen to just that frequency. Now we have spread-spectrum transmitters that 'match' a particular transmitter to a receiver by sending a specific sequence of these radio waves so that no other receivers can detect meaningful data. In either case, once the receiver, either traditional or spread-spectrum receives the signal from the transmitter, this is translated them into movement of motors on board the plane. Those motors are known as servos and rotate (or move) as the control levers on the transmitter are moved. You connect the servos to different control surfaces on the plane such as the rudder or elevator. So, when you move the 'rudder stick' on the transmitter, the rudder moves on the model, and so one for each of the transmitter controls.
Typically, a radio system package comes with just about everything you need to install and use a radio with a model. Novice or beginner sailplanes usually need only 2 channels of control, but you are still better off purchasing a radio with at least 4 channels of control. Most 4-channel radios come complete with nickel-cadmium or other type of rechargeable battery packs that are reliable and can give many years of service. Many of these radios also can come with internal electronic servo mixing options, useful on V-Tail and Elevons.
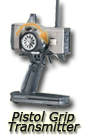
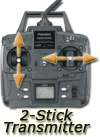
There are still brands of radios that are advertised as 2-channel units, have 2 control levers, but the lever on the left only moves up and down and is for is for elevator (up and down) control only. The lever (or stick) on the right only moves right and left and is used typically for rudder only. These are also known as '2-Stick Transmitters' and are is NOT the preferable configuration for most pilots and it can be difficult to find a fellow pilot who will (or even can) fly with this setup. I really wouldn't recommend buying one of these old-style radio transmitters as I think it will frustrate you. There are 4, 6, 7, 8, 9-channel transmitters (and receivers), up to even 32 channels or more in expensive systems. There are also a completely different class of radios used for cars and boats known as 'Pistol Grips', but they also operate in the same basic manner, you just don't have enough inputs to control a plane.

|
Most better radio systems have at a range of at least a half mile or more (in the air). This means that as long as you can see your plane, you still should be able to control it.
Some radios have the additional capability of connecting one radio transmitter to another to help
the beginning pilot learn.
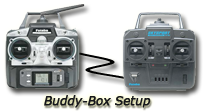 This capability is sometimes known as a trainer or 'buddy box'.
A cable connects two transmitters of the same brand and pressing a switch on the main transmitter, allows the other control over the plane.
If the plane 'gets into trouble', the person helping teach the beginning pilot just releases the switch on the main transmitter and regains control of the plane without incident.
The only problem with this technique is that you need two transmitters of the same type as different brands or types of radio transmitters often cannot
be used together as a buddy-box setup.
Also, there is a method of using different transmitters to wirelessly connect them together: 'Wireless Buddy Box' where this can be connected
to two functional transmitters.
This capability is sometimes known as a trainer or 'buddy box'.
A cable connects two transmitters of the same brand and pressing a switch on the main transmitter, allows the other control over the plane.
If the plane 'gets into trouble', the person helping teach the beginning pilot just releases the switch on the main transmitter and regains control of the plane without incident.
The only problem with this technique is that you need two transmitters of the same type as different brands or types of radio transmitters often cannot
be used together as a buddy-box setup.
Also, there is a method of using different transmitters to wirelessly connect them together: 'Wireless Buddy Box' where this can be connected
to two functional transmitters.
Radio control units that are available today come in many varieties and brands that can be broken down into three types:
** Spread-spectrum radios are now available in very low cost models, sometimes as little as $50 for the entire package.
As was mentioned before, up until recently, there WERE two modulation methods, AM and FM, just like the radio in a car. And just like in a car radio, AM signals are noisier and therefore less reliable in a place where there are a lot of radio signals nearby, such as a crowded field. The FM signal can also be modulated in a digital form where there are individual pulses sent rather than just a waveform. This is known as PCM (Pulse-Coded-Modulation). I have found that PCM receivers are a bit heavier and haven't really helped with my flying experience. I know there are many people out there, mostly those that fly helicopters, that wouldn't use anything else over PCM.
For sailplanes, typically only AM and FM radios were used as PCM circuitry tended to be heavier and really doesn't add tremendous benefit. PCM circuitry (and FM) is used and sometimes required on aircraft that have electric motors or gas engines. This is due to the added radio frequency noise (also known as RF noise) that tends to be generated by those setups. Sailplanes aren't infallible though, as some control linkages for controlling only rudders or elevators can generate RF noise, especially if the linkages have metal to metal connections. The bottom line is that you can usually get away with a FM radio control system or even AM radio system, if you have a simpler setup with minimal metal-to-metal linkages (unlike a helicopter which can have many). I only have one PCM radio system and my personal experience with it hasn't been that great. I've been completely satisfied with FM modulation.
So now, the majority of radio systems available today are Spread-Spectrum and have many distinct advantages. For many years, there were only radios that transmitted in a narrow range of frequencies, different in different countries. The USA had a couple of ranges, 26 MHz and 72 MHz bands, and if you had a HAM-Radio license, you could also get and use a radio on 53 MHz. Before spread-spectrum radios, pilots whose radios were on the same frequency had to take turns as only one pilot can use their transmitter on that one frequency at a time. Now that we have spread-spectrum systems, each transmitter-receiver pair essentially is on its own frequency. Pilots that have spread-spectrum radios no longer have to find out what frequency other pilots in the area have and can fly without worry of interference as in previous radio systems. Most spread-spectrum radios transmit on a 2.4Ghz frequency. And, now you can even have multiple spread-spectrum receivers in the same plane so that if one receiver "fails", the other(s) can take over signals reception for even better reliability.
The only major disadvantage of the spread-spectrum radio technology is that most of the time, you may need to use the same manufacturer of the spread-spectrum transmitter matched with same manufacturer's receiver. There are several different modulations used in spread-spectrum transmission from different manufacturers, with names including: FHSS, FASST, ACCESS, DMSS, etc. With previous radio systems you could often mix a Futaba FM transmitter with a Hitec receiver and get perfect results.
JR and Spektrum radios are from the same internal manufacturer so those spread-spectrum receivers seem to be compatible. Also, one thing nice about the Spektrum receivers is that some of the lightweight receivers have internal voltage regulators - which means you can connect a lightweight 2-cell Lithium Polymer (LiPo) pack that normally would supply 7.4 volts, blowing up many other brands of receivers.
Also, if you're living in the USA or other parts of North America, you'll probably want to buy a radio system in Mode II. Mode I is used often in Europe and other parts of the world, and it's helpful to have the radios in the same mode. You can read more about Mode I & II modes in the glossary.
If you want to read more about Radio Controls, Servos, Frequencies, and more, choose one of the links below:
Here's a list of some more recent and popular aircraft radios that are used in R/C Sailplanes (no pistol grips radios in this list):

- FS-i4x - 4-10 channels, 2.4Ghz AFHDS/AFHDS 2A protocol (discontinued)
- FS-T4B - 4 channel, 2.4Ghz AFHDS protocol
- FS-T6 - 6 channel, 2.4Ghz AFHDS protocol
- FS-CT6B - 6 channel, 2.4Ghz AFHDS protocol
- FS-i6 - 4-10 channels, 2.4Ghz AFHDS/AFHDS 2A protocol (discontinued)
- FS-i6S - 10 channel, 2.4Ghz AFHDS 2A/PWM/PPM protocols (discontinued)
- FS-i6x - 4-10 channels, 2.4Ghz AFHDS/AFHDS 2A/PWM/PPM protocols (discontinued)
- FS-TH9X - 14 channel, 2.4Ghz AFHDS/AFHDS 2A protocols (discontinued)
- FS-NV14 - 14 channel, 2.4Ghz AFHDS 2A protocols
- Elysium FS-EL18 - 8-12 channels, 2.4Ghz AFHDS/AFHDS 2A/AFHDS 3 protocols
- FS-ST8 - 8-12 channels, 2.4Ghz AFHDS 2A protocol
-
 Paladin PL18 Lite - 18 channel, 2.4Ghz AFHDS/AFHDS 2A/AFHDS 3 protocols
 -
Paladin PL18 - 18 channel, 2.4Ghz AFHDS/AFHDS 2A/AFHDS 3 protocols
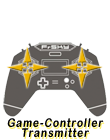
- Taranis X-Lite - 16-channel, game-controller-style, 2.4GHz spread-spectrum, OpenTx
- Taranis X-Lite S - 16-channel, game-controller-style, 2.4GHz spread-spectrum, OpenTx, ACCESS protocol
- Taranis X-Lite Pro - 16-channel, game-controller-style, 2.4GHz Elevated spread-spectrum, OpenTx, ACCESS protocol
- Taranis Q X7 - 32-channel, 2.4GHz spread-spectrum OpenTx computer radio
- Taranis Q X7S - 32-channel, 2.4GHz spread-spectrum OpenTx computer radio
- Taranis X9 Lite - 24-channel, 2.4GHz spread-spectrum, OpenTx computer radio, ACCESS protocol
- Taranis X9 Lite S - 24-channel, 2.4GHz spread-spectrum, OpenTx computer radio, ACCST/ACCESS protocol
- Taranis X9D Plus - 24-channel, 2.4GHz spread-spectrum, OpenTx (discontinued)
- Taranis X9D Plus SE - 24-channel, 2.4GHz spread-spectrum, OpenTx (discontinued)
- Taranis X9D Plus 2019 - 24-channel, 2.4GHz spread-spectrum, OpenTx computer radio, ACCST/ACCESS protocol
- Taranis X9D Plus SE 2019 - 24-channel, 2.4GHz spread-spectrum, OpenTx computer radio, ACCST/ACCESS protocol
- Taranis X9E - 16/32-channel, 2.4GHz spread-spectrum, FrOS & OpenTx (discontinued)
- Horus X10 - 16/32-channel, 2.4GHz spread-spectrum, FrOS & OpenTx (discontinued)
- Horus X10S - 16/32-channel, 2.4GHz spread-spectrum, FrOS & OpenTx (discontinued)
-
Horus X10 Express - 16/32-channel, 2.4GHz spread-spectrum, ETHOS, ACCST/ACCESS protocol
-
Horus X10S Express - 16/32-channel, 2.4GHz spread-spectrum, ETHOS, ACCST/ACCESS protocol
- Horus X12S - 16/32-channel, 2.4GHz spread-spectrum, FrOS & OpenTx (discontinued)
- Horus X12S-ISRM - 16/32-channel, 2.4GHz spread-spectrum, ETHOS, ACCST/ACCESS protocol
- TWIN X Lite - 16/32-channel, dual 2.4GHz bands, ETHOS, ACCST/ACCESS/TW protocol
- TWIN X14 - 16/32-channel, dual 2.4GHz bands, ETHOS, ACCST/ACCESS/TW protocol
- TWIN X14S - 16/32-channel, dual 2.4GHz bands, ETHOS, ACCST/ACCESS/TW protocol
- TANDEM XE - 24-channel, dual 2.4GHz & 900Mhz bands, ETHOS, ACCST/ACCESS/TW protocol
- TANDEM X18 - 24-channel, dual 2.4GHz & 900Mhz bands, ETHOS, ACCST/ACCESS/TW protocol
- TANDEM X18S - 24-channel, dual 2.4GHz & 900Mhz bands, ETHOS, ACCST/ACCESS/TW protocol
- TANDEM X18SE - 24-channel, dual 2.4GHz & 900Mhz bands, ETHOS, ACCST/ACCESS/TW protocol
- TANDEM X20 - 24-channel, dual 2.4GHz & 900Mhz bands, ETHOS, ACCST/ACCESS/TW protocol
- TANDEM X20R - 24-channel, dual 2.4GHz & 900Mhz bands, ETHOS, ACCST/ACCESS/TW protocol
- TANDEM X20S - 24-channel, dual 2.4GHz & 900Mhz bands, ETHOS, ACCST/ACCESS/TW protocol
- TANDEM X20RS - 24-channel, dual 2.4GHz & 900Mhz bands, ETHOS, ACCST/ACCESS/TW protocol
- TANDEM X20 PRO - 24-channel, dual 2.4GHz & 900Mhz bands, ETHOS, ACCST/ACCESS/TW protocol
- TANDEM X20 PRO AW - 24-channel, dual 2.4GHz & 900Mhz bands, haptic support, ETHOS, ACCST/ACCESS/TW protocol
-
TANDEM X20 HD - 24-channel, integrated 5.8G + FPV video screen, ETHOS, ACCST/ACCESS/TW protocol
- 4YF - 4-channel, entry-level FHSS 2.4GHz spread-spectrum radio
- 6J - 6-channel, S-FHSS/FHSS 2.4GHz spread-spectrum radio (discontinued)
- 6L - 6-channel, T-FHSS/FHSS 2.4GHz spread-spectrum radio
- 6K - 8-channel, T-FHSS/FHSS, 2.4GHz spread-spectrum radio (discontinued)
- 6K-V3S - 8-channel, T-FHSS/FHSS, 2.4GHz spread-spectrum radio
- 8J - 8-channel, S-FHSS/FHSS 2.4GHz spread-spectrum radio (discontinued)
- 10J - 10-channel, T-FHSS/FHSS 2.4GHz spread-spectrum radio
- 12K - 14-channel, T-FHSS 2.4GHz spread-spectrum computer radio
- 14SG - 14-channel, FASSTest/FASST/T-FHSS/S-FHSS 2.4GHz spread-spectrum computer radio (discontinued)
- 16IZ - 18-channel, FASSTest/FASST/T-FHSS/S-FHSS 2.4GHz spread-spectrum computer radio (discontinued)
- 16IZS - 18-channel, FASSTest/FASST/T-FHSS/S-FHSS 2.4GHz spread-spectrum computer radio
- 16SZ - 18-channel, FASSTest/FASST/T-FHSS/S-FHSS 2.4GHz spread-spectrum computer radio (discontinued)
- 18SZ - 18-channel, FASSTest/FASST/T-FHSS/S-FHSS 2.4GHz spread-spectrum computer radio
- 18SZ - 70th Anniversary - 18-channel, FASSTest/FASST/T-FHSS/S-FHSS 2.4GHz spread-spectrum computer radio (discontinued)
- 18MZ-WC - 18-channel, FASSTest/FASST/T-FHSS/S-FHSS, Windows CE OS, 2.4GHz computer radio with telemetry
- 32MZ - 18-channel, FASSTest/FASST/T-FHSS/S-FHSS, Windows Compact 7 OS, 2.4GHz computer radio with telemetry
-
For those of you that keep seeing these VERY OLD, discontinued Futaba radios in the hobby stores, here's some of my descriptions about those radios - really, you probably shouldn't buy one of these.
- Attack series - 4-channel AM radio
- Conquest series - 4-channel FM radio
- 6X, 8U, and 9Z series - FM computer radios
- Grand Wing Servo-Tech - Transmitters, Receivers, and Flight packs
- Optic 5 - 5-channel AFHSS 2.4GHz spread-spectrum computer radio
- Optic 6 Sport - 6-channel AFHSS 2.4GHz spread-spectrum computer radio
- Eclipse 7 Pro - 7-channel AFHSS 2.4GHz spread-spectrum computer radio
- Flash 7 - 7-channel AFHSS/SLT 2.4GHz spread-spectrum computer radio
- Aurora 9 - 9-channel AFHSS/PPM/PCM 2.4GHz spread-spectrum computer radio
- Aurora 9X - 9-channel AFHSS/SLTTM 2.4GHz spread-spectrum computer radio
- Colt Retro - 6-channel, DMSS 2.4Ghz spread-spectrum radio (discontinued)
- XG6 - 6-channel, DMSS 2.4Ghz spread-spectrum radio
- XG8 - 8-channel, DMSS 2.4Ghz spread-spectrum radio
- XG11 - 11-channel, DMSS 2.4Ghz spread-spectrum radio
- XG11MV - 11-channel, DMSS 2.4Ghz spread-spectrum radio with XBus
- XG14 - 14-channel, DMSS 2.4Ghz spread-spectrum radio
- 28X - 28-channel, DMSS 2.4GHz radio

- Esprit IV - FHSS spread-spectrum radio
- VBar Control EVO - 80 channel, FHSS spread-spectrum radio
- VBar Control Touch - 80 channel, touch screen, FHSS spread-spectrum radio
- VBar Control Touch - 80 channel, touch screen, FHSS spread-spectrum radio
- Smart SX - 6 channel, entry-level, M-LINK only receivers
- SMART SX 9 - 9 channel, M-LINK only receivers
- COCKPIT SX 9 - 9 channel, touch display, M-LINK only receivers
- COCKPIT SX 12 - 12 channel, touch display, M-LINK only receivers
- CORE Handheld - 16-26 channels, touch & haptics, M-LINK only receivers
- CORE Black Tray - 16-26 channels, touch display, M-LINK only receivers
- CORE Titanium Tray - 16-26 channels, touch display, M-LINK only receivers
- T8S Handle - 8 channel, FHSS mini-transmitter
- T8S Handle (BT) - 8 channel, FHSS mini-transmitter
- T8FB - 8 channel, inexpensive, entry-leve,l FHSS protocol
- T8FB (BT) - 8 channel, inexpensive, entry-level, FHSS protocol
- AT9S - 10-12 channels, FHSS/DSSS protocol, haptic support
- AT9S Pro - 10-12 channels, FHSS/DSSS/CRSF, compatible with TBS crossfire, haptic support
- AT10 II - 12 channel, FHSS/DSSS protocols, long range support
- Pocket Radio (M2) - 16 channel, 2.4Ghz CC2500/ELRS FrSky compliant spread-spectrum radio
- Boxer Radio (M2) - 16 channel, 2.4Ghz CC2500/ELRS FrSky compliant spread-spectrum radio
- Boxer Max Radio (M2) - 16 channel, 2.4Ghz ELRS/CC2500/CYRF6936/A7105/NRF2401 spread-spectrum radio
- Zorro (M2) - 16 channel, 2.4Ghz CC2500/ELRS FrSky compliant spread-spectrum radio
- Zorro Max (M2) - 16 channel, 2.4Ghz ELRS/CC2500/CYRF6936/A7105/NRF2401 spread-spectrum radio
- Zorro Limited Edition - 16 channel, 2.4Ghz ELRS/CC2500/CYRF6936/A7105/NRF2401 spread-spectrum radio
- TX12 Mark II - 16 channel, 2.4Ghz CC2500/ELRS FrSky compliant spread-spectrum radio
- TX16S Mark II - 16 channel, 2.4Ghz ELRS/CC2500/CYRF6936/A7105/NRF2401 spread-spectrum radio
- TX16S Mark II Max - 16 channel, 2.4Ghz ELRS/CC2500/CYRF6936/A7105/NRF2401 spread-spectrum radio
- TX16S Mark II MAX (Customized Version) - 16 channel, 2.4Ghz ELRS/CC2500/CYRF6936/A7105/NRF2401
- TX16S Mark II Max Pro - 16 channel, 2.4Ghz ELRS spread-spectrum radio
- DXS - 7-channel, DSMX/DSM2 2.4GHz spread-spectrum
- DX5e - basic 5-channel, DSMX/DSM2 2.4GHz spread-spectrum
- DX6e - basic 6-channel, DSMX/DSM2 2.4GHz spread-spectrum
- DX6i - 6-channel, DSMX/DSM2 2.4GHz spread-spectrum (discontinued)
- DX7 - 7-channel, DSMX/DSM2 2.4GHz spread-spectrum (discontinued)
- DX7se - 7-channel, DSMX/DSM2 2.4GHz spread-spectrum (discontinued)
- DX8e - 8-channel, DSMX/DSM2 2.4GHz spread-spectrum
- DX18 - 18-channel, DSMX/DSM2 2.4GHz spread-spectrum (discontinued)
- DX20 - 20-channel, DSMX/DSM2 2.4GHz spread-spectrum (discontinued)
- NX7e - 7-channel, DSMX/DSM2 2.4GHz spread-spectrum
- NX8 - 8-channel, DSMX/DSM2 2.4GHz spread-spectrum
- NX10 - 10-channel, DSMX/DSM2 2.4GHz spread-spectrum
- NX10SE - 10-channel, Special Edition, DSMX 2.4GHz spread-spectrum
- iX12 - 12-channel, choice of colors, DSMX/DSM2 2.4GHz spread-spectrum (discontinued)
- iX14 - 14-channel, DSMX 2.4GHz spread-spectrum
- iX20 - 20-channel, DSMX 2.4GHz spread-spectrum